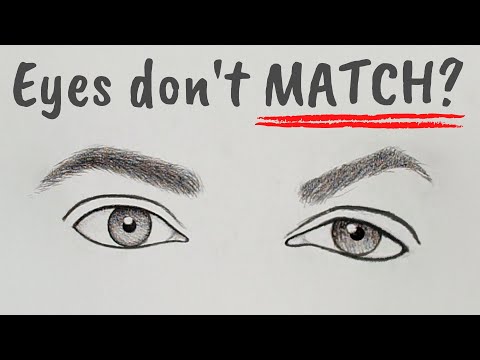
Whether you’re creating a portrait or working on a comic strip, every artist needs to know how to draw eyes. Since there are so many styles and options for eye drawing, we’ll cover how to draw realistic eyes, anime eyes, and cartoon eyes.
Ready to get started? You’ll need the following materials:
Drawing paper or a sketchbook
Drawing pencils
An outlining pen
An eraser
A reference photo of realistic eyes
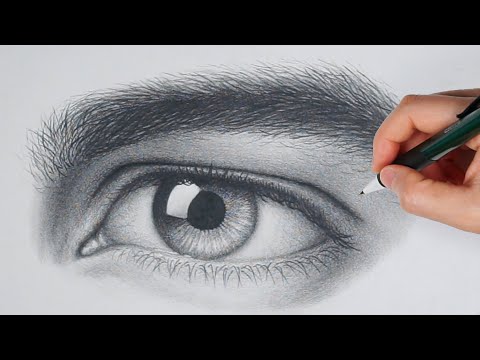
How to Draw Realistic Eyes
Though learning how to draw realistic eyes may seem like a challenge, it is simpler than it seems. Realistic eyes are created by drawing basic, easy-to-identify shapes, and with a little patience, you’ll be able to draw them in no time!
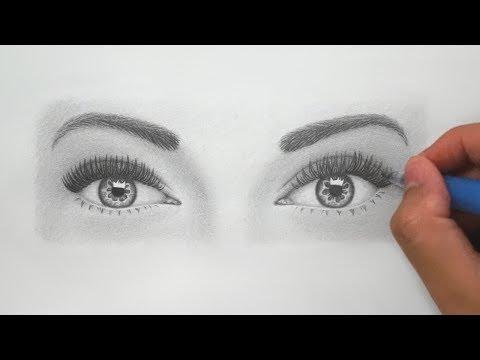
Realistic eyes by Skillshare student Mandy Lay.Realistic eyes by Skillshare student Mandy Lay.
Step 1: Make Measurements Based Upon Your Reference Photo
You’ll begin by making some measurements based upon your reference photo. This will ensure that your eye drawing is realistic in both composition and perspective when it’s finished.
Place a piece of blank paper under your reference photo and line the top of it up with the rim of the eyes in the photo. From there, make marks to show the edges of the eyelashes, the ends of the sclera (also known as the whites of the eyes), and the outer and inner edges of the tear ducts for each eye. These measurements will serve as your starting points when drawing your eyes.
Measure based upon your reference photo to ensure that your eye drawing is the correct size.Measure based upon your reference photo to ensure that your eye drawing is the correct size.
Step 2: Transfer Your Measurements to Your Drawing Paper
Next, place your measurement paper on top of a piece of drawing paper and begin forming the basic lines and shapes of your realistic eye drawing. Using a light touch, you will create a curved line from the inside tear duct measurements to the outside sclera measurements, and draw a “flipped up” line at the end to show where the eyelashes will be in the drawing’s final form.
Your measurements will ensure the correct shape and size for your eye drawing. Your measurements will ensure the correct shape and size for your eye drawing.
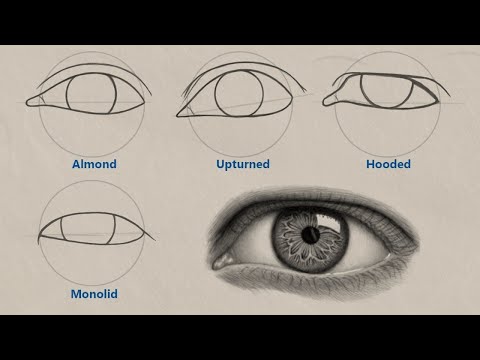
Step 3: Draw the Eye and Eyelid Shape
Be sure to carefully consider the angles of the eyes in your reference photos and mimic them as you begin to form the curved lines of both the eyes and eyelids. You’ll want to use a second curved line to draw the eyelids, being mindful of the thickness of this feature. It may not look like much just yet, but in a few more steps, the eyes will begin to appear more realistic and familiar!
Continue to finesse your eye shape and add eyelids based upon your reference photo. Continue to finesse your eye shape and add eyelids based upon your reference photo.
Step 4: Draw the Irises
In this step, you’ll focus on creating the irises. Many illustrators suggest focusing on the negative space—the whites of the eyes in this instance—to ensure that the irises are the correct shape and size.
To utilize negative space, look at the reference photo and pull out shapes that you can transfer onto your drawing paper. Within the tear ducts, for example, there is a small triangular shape that can be included to help form the boundaries of the sclera and irises.
Use negative space to inform the placement and size of your irises.Use negative space to inform the placement and size of your irises.
Step 5: Draw the Eyebrows
Now that your realistic eye drawing has the basic shapes and components of the eyeball, it’s time to add eyebrows. Again, keeping your reference photo in mind, begin with the bottom line of each eyebrow. Once you’re sure that the placement is correct and that you have enough space between your eyeballs and the eyebrow, draw the top line of the eyebrow and connect it to the lower line at the outer apex.
Draw eyelashes and pupils to complete your eye drawing outline. Draw eyelashes and pupils to complete your eye drawing outline.
Step 6: Draw Eyelashes and Pupils
With your eyebrows now in place, draw eyelashes and pupils to finish the outline of your realistic eye drawing. In step two, you created a “flipped up” line to hold space for your eyelashes. Now, fill the eyelashes in according to your reference photo. Then, add a smaller circular shape on the inside of the iris to show the pupils.
Start shading with a light wash over your entire drawing.Start shading with a light wash over your entire drawing.
Step 6: Add Shading
With your eye drawing outline complete, you can begin adding detail through shading. Start by adding a light wash shade over your entire drawing.
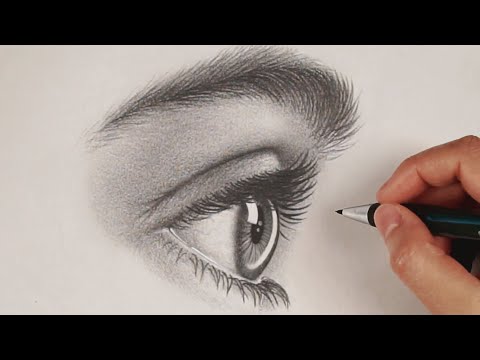
Shading brings your realistic eye drawing to life!Shading brings your realistic eye drawing to life!
Once your initial shading is in place, you can go back and add additional layers, where needed, based upon your reference photo. You can also use a tissue or a light touch with your eraser to blend the shading together; especially near the outer edges of the eyelashes and eyebrows.
When you’re finished adding your desired details, your drawing is complete. When you’re finished adding your desired details, your drawing is complete.
Step 8: Add Final Details and Finish Your Drawing
When you’re happy with your shading, finalize your realistic eye drawing by adding as much detail as you’d like. You may want to use an outline pen or even a white gel pen to include more nuanced, lifelike details.